Pumpkin Carving for Halloween
Find inspiration for your Halloween Pumpkin Carving Party with these original Pumpkin Carving ideas, designs, and patterns. If you are planning a Autumn-themed party consider decorating your tables with some of these modern pumpkin carvings.
Pumpkins, gourds and watermelons have become the medium of professional carving artists and chefs who have turned ordinary earthy vegetables into perishable works of art. Seasonal fruits and vegetables go under the knife to be transformed into star and flower-shaped lanterns, yellow roses and zinnias.
Take inspiration from professional carvers, like Chef Ray Duey, to take your pumpkin carving to a new level this year.
| Jack-o-Lanterns |
 |
 |
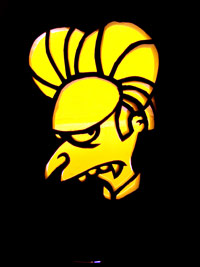 |
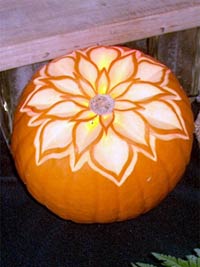
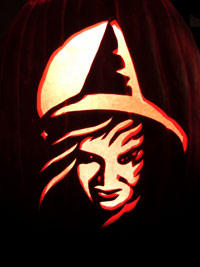
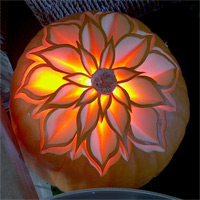
| Pumpkin Flower Lantern | Pumpkin Witch Lantern | Simpson's Pumpkin Carving |
These pumpkin lanterns were carved by Chef Duey for the Halloween season. He can also turn a lowly turnip into a beautiful flower, an eggplant into an artful leaf and a pumpkin into a turkey!
 |
 |
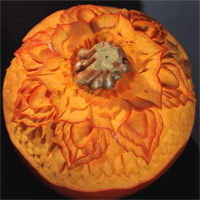 |
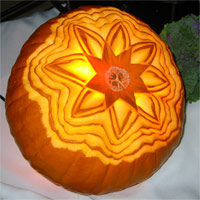
| Eight-pointed Star Pumpkin Lantern | Three-tiered Pumpkin Flower Lantern | Thai-inspired Pumpkin Carving |
Images © 2010 Chef Ray Duey; Text © 2010 TempleofThai.com
| Chef Ray Duey |
The art of fruit and vegetable carving is traditionally very time consuming and intricate, requiring years of practice under the guidance of a master carver, which has made it difficult and impractical to learn.
Then along came professional American chef Ray Duey, who has worked continuously for the past 20 years to refine and modernize these ancient fruit and vegetable carving techniques. By using time-saving tools like the U and V cutters for carving, Chef Duey's techniques make it possible to turn out plate garnishes in minutes that appear to be intricate, mysterious and labor-intensive to the beholder. Other specially designed carving knives and tools of the Chef include a handmade flexible carving knives from Thailand. These light-weight tools help to save the wrists from fatigue says Chef Duey. The Thai flexible knife was used to make the pumpkin carvings shown above.
Many fruit and vegetable carvings including the turnip flower and eggplant leaves, are easy enough for anyone to try, including the home cook, according to the Chef.
If you would like to learn how easy it can be to carve these beautiful carvings, Chef Duey teaches classes in the art of fruit and vegetable carving throughout the US for both culinary professionals and avid amateurs (see his web site for schedules).
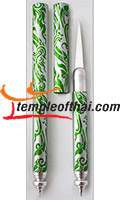
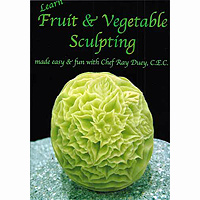
To get started carving now, check out Chef Ray Duey's Fruit and Vegetable Carving DVD. Chef Duey is a Certified Executive Chef through the American Culinary Federation and has been teaching the culinary arts for over 20 years to professionals chefs, caterers, and individuals.
 |
 |
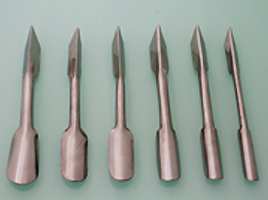 |
| Flexible Carving Knife | Fruit & Vegetable Carving DVD | Set of 6 U and V Garnishing Tools |
| More Pumpkin Carving |

See more carvings including a pumpkin carving by Chef Carl Jones
Images © 2010 Chef Carl Jones
| Your Comments |